How to Add & Change Walls
You’ll want an accurate, realistic floor plan of your client’s room before you begin to design. The following steps describe how to set the defaults, length and height, position, angle, and other parameters of your walls in KCD Software.
NOTE: In the following steps, we’ll be viewing the floor plan for a room only. (To switch between floor plan and elevation, press the Spacebar twice or click on View and then click on Elevation Floor Plan.)
Reset the Defaults for Wall Height and Thickness
KCD Software comes to you with a default standard of 96 inches for the Wall Height and 4½ inches for the Wall Thickness. In this example, we’re going to assume that you want walls that are 108 inches high. Therefore, you need to the change the KCD Software default standard height from 96 to 108.
If you set the default height (and thickness) to match your typical projects, you will make fewer changes each time you start a new project.
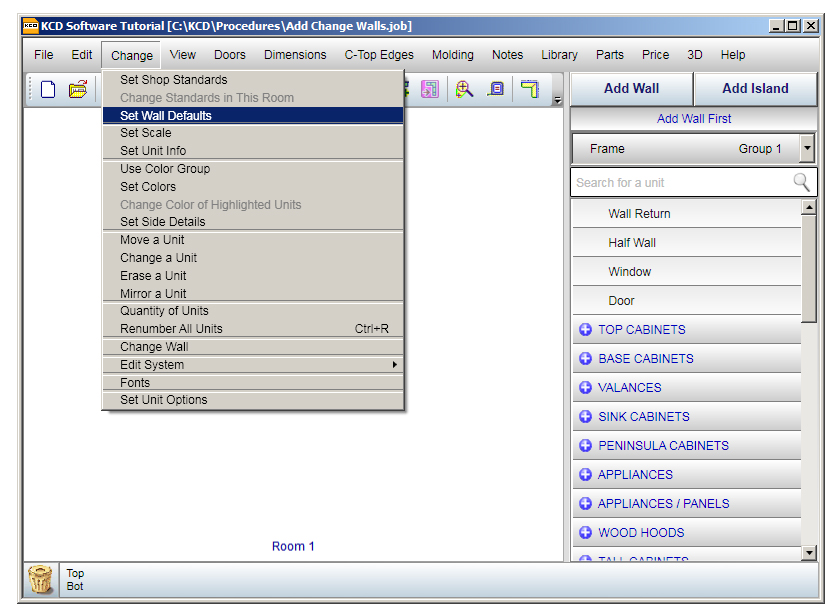
To change the defaults:
- Click on Change in the top menu bar.
- Click on Set Wall Defaults.
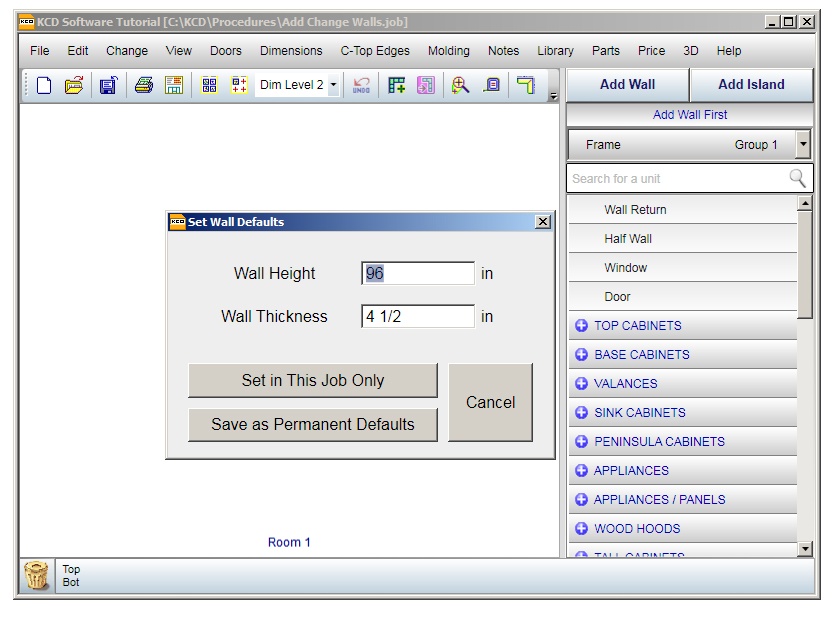
- A menu appears with the current default standards. When you first open KCD Software, the default Wall Height is 96 inches and the default Wall Thickness is 4½ inches.
- Let’s change one of the default numbers: type in a height of 108 inches.
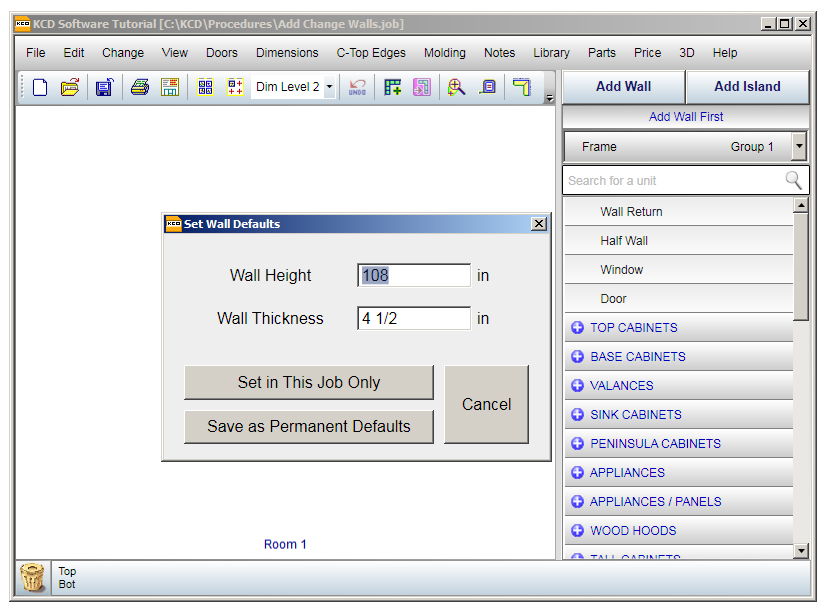
- If you want to set the wall height to 108 for all projects, click on Save as Permanent Defaults.
If you want to set the wall height to 108 for your current project only, click on Set in This Job Only.
Set a Wall’s Length
Let’s say that you’ve changed the default height of walls to 108 inches. Now you need to set the length and position of the walls.
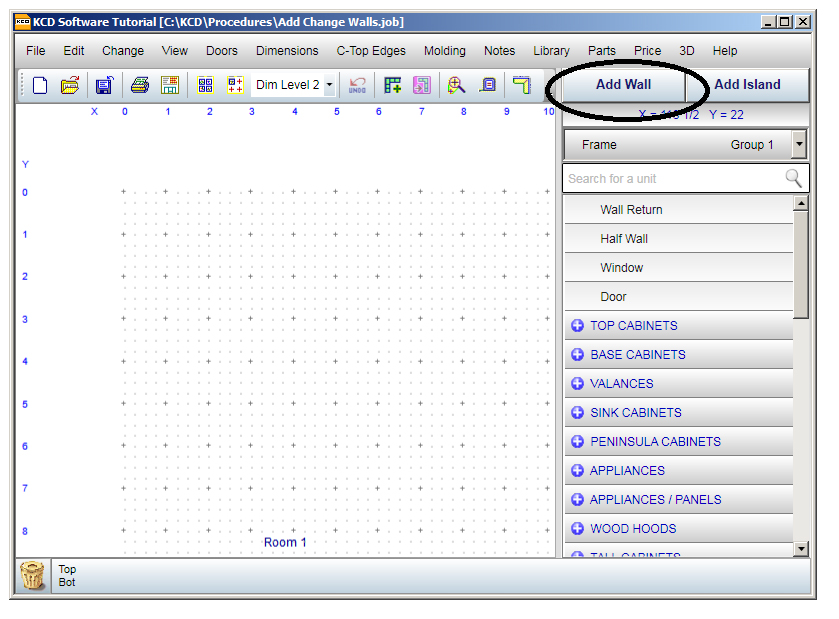
- Click on Add Wall in the upper right. A grid appears.
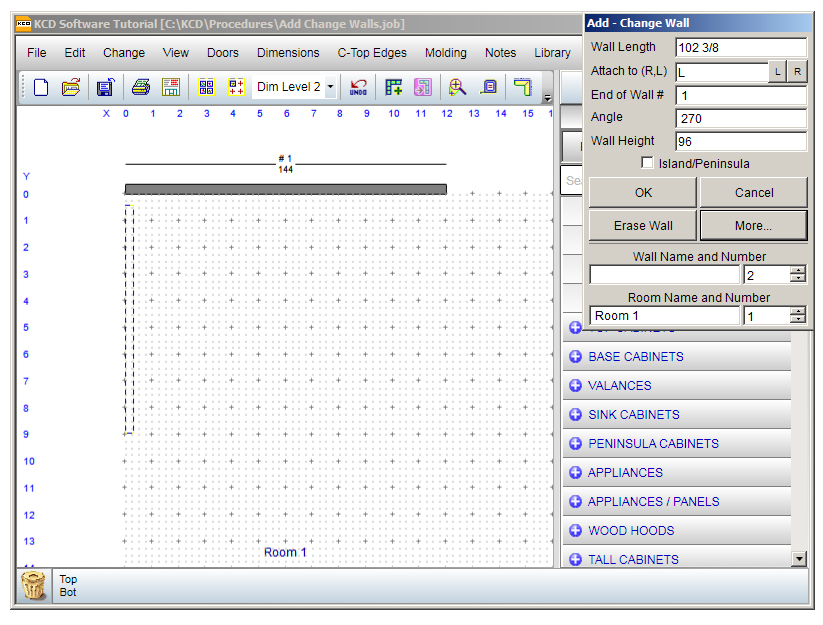
- Use your cursor to drag the wall to the Wall Length you want. When you stop dragging, the Add – Change Wall menu pops up. The default Wall Height is correct at 96 inches, but you may to change the wall length.
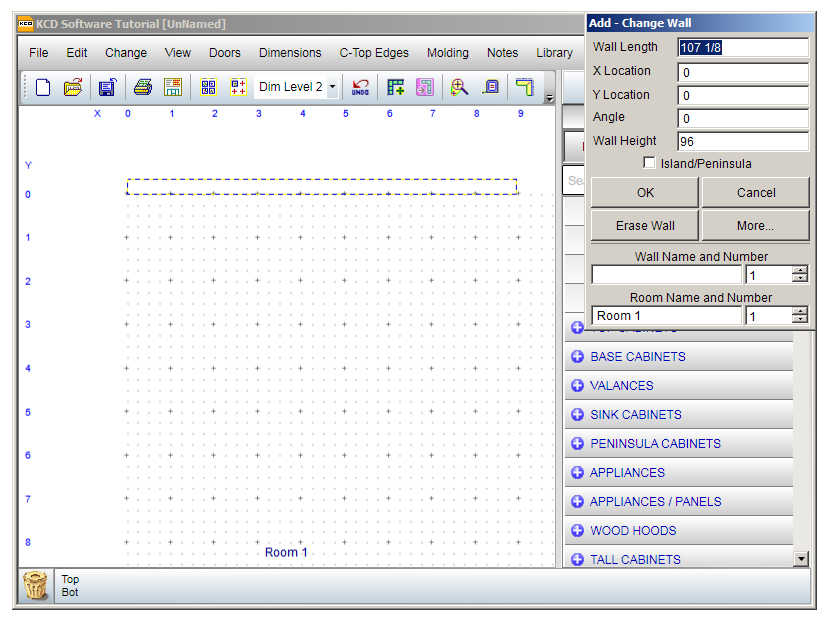
- Type the Wall Length you need (in this case 144) into the Add – Change Wall
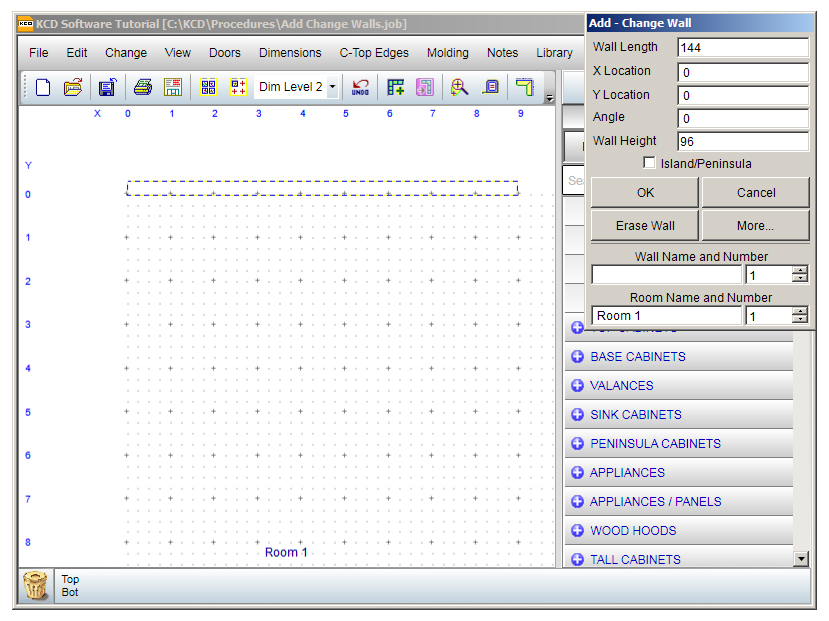
- Click on The wall length automatically changes to 144 inches inches.NOTE: The length of the wall shown on the diagram below is the length inside the room where you will be arranging cabinets.
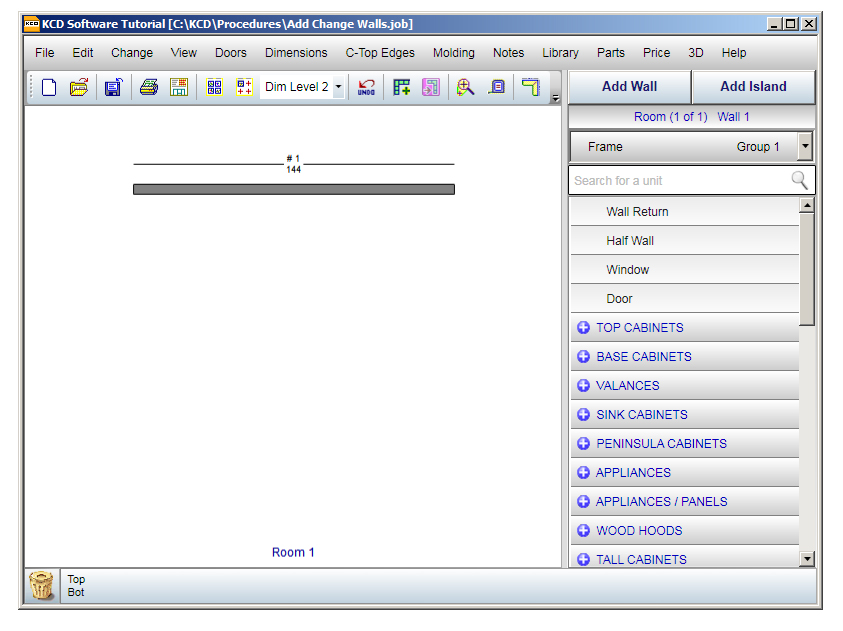
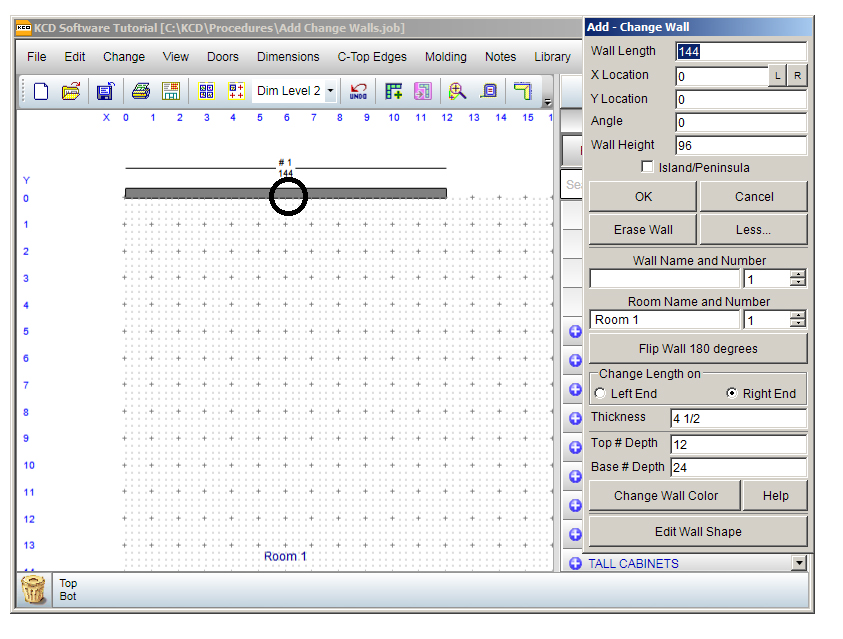
If you want to change Wall Length and/or Wall Height for this wall (#1), double click in the center of the wall and the Add – Change Wall menu will reappear.
The Add – Change Wall menu allows you to manipulate walls in a number of ways. We’ll describe how to flip a wall later on in this how-to. But you might want to try out some options on your own. Press the More button to show all of the options listed in the picture here.
In this screenshot, the grid is turned out: click on View, then click on Show Grid.
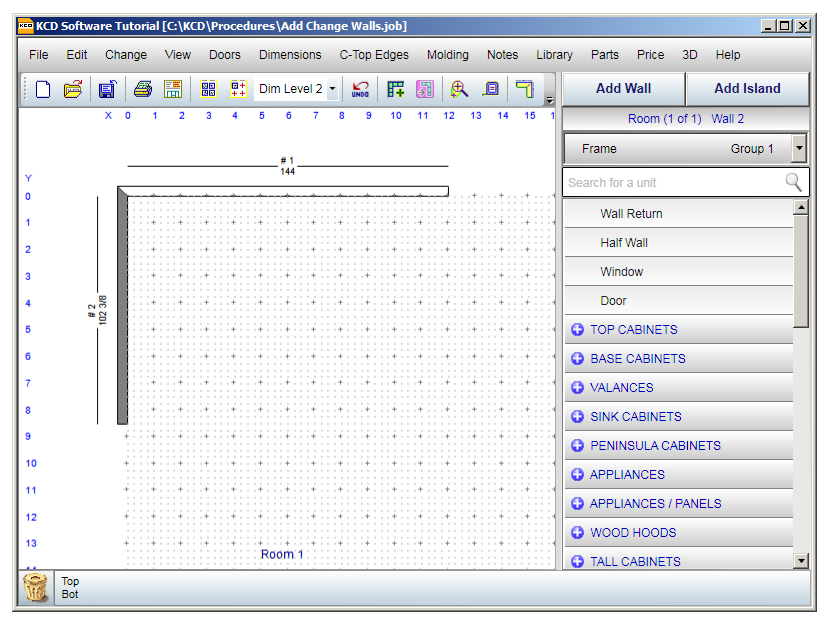
Add a Second Wall and Set Its Position
Assume you have one wall of the room you are designing: 99 inches long by 108 inches high. You need to complete the rest of the walls.
- To draw the left-hand wall, click on Add Wall.
- Place your cursor at the far left of Wall 1 and drag down. When you stop dragging, the Add – Change Wall menu pops up.
- Change any numbers you need to in the Add – Change Wall
- When the numbers in the menu are correct, click on OK and the wall snaps into position.
Change the Angle of a Wall
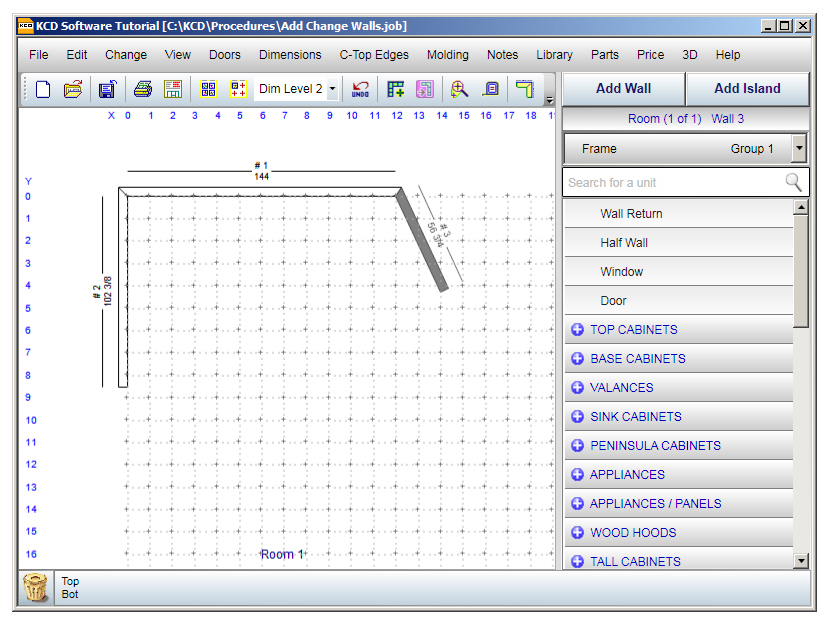
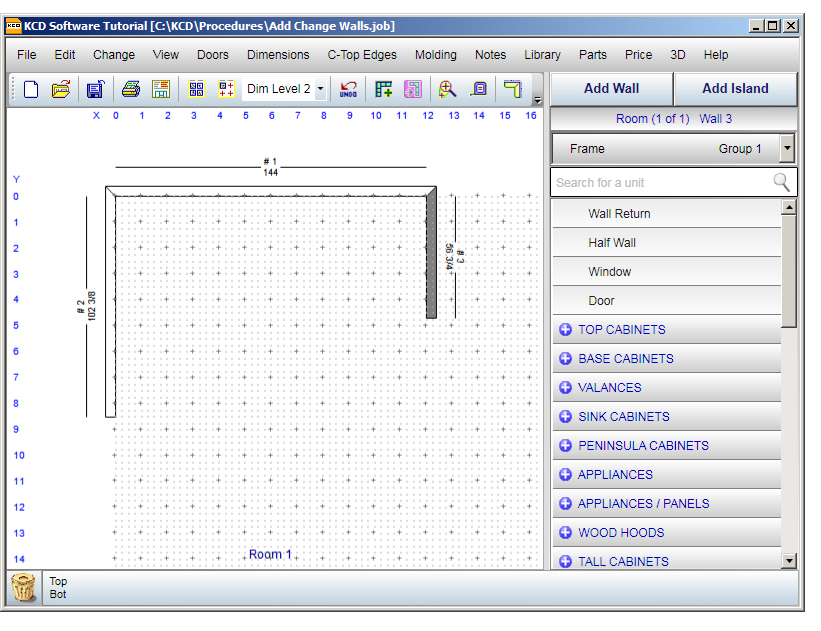
In the picture below, a short wall (#3) has been added to the right of the room.
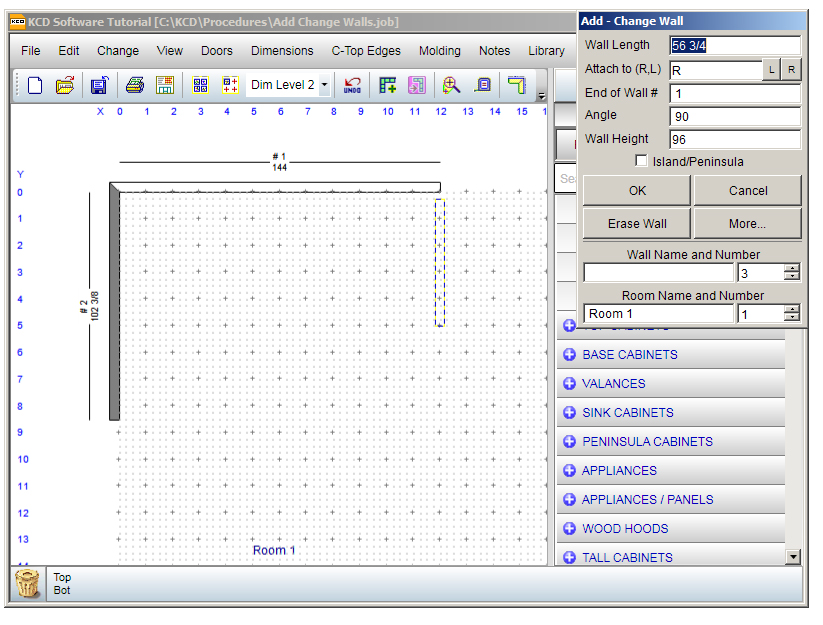
- Once all the numbers in the Add – Change Wall menu are correct, click on OK to snap the wall into position.
- Let’s say you want to angle this wall. Click on the bottom of the wall and your cursor will change.
- As you hold down your left mouse button, you can drag the wall to any angle.

- When you release the mouse, the wall snaps into position at the angle you selected
- If you want to change the angle only, click on the bottom of the wall and move it again with the cursor.
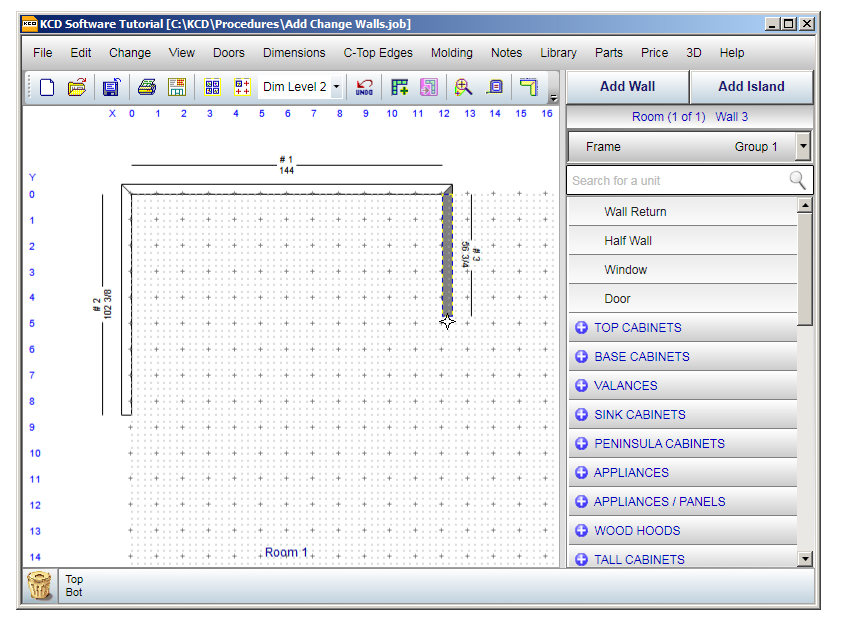
If you need a more precise angle, double click on the middle of the wall and the Add – Change Wall menu will pop up. You can type in the exact angle (in this case 55 degrees).
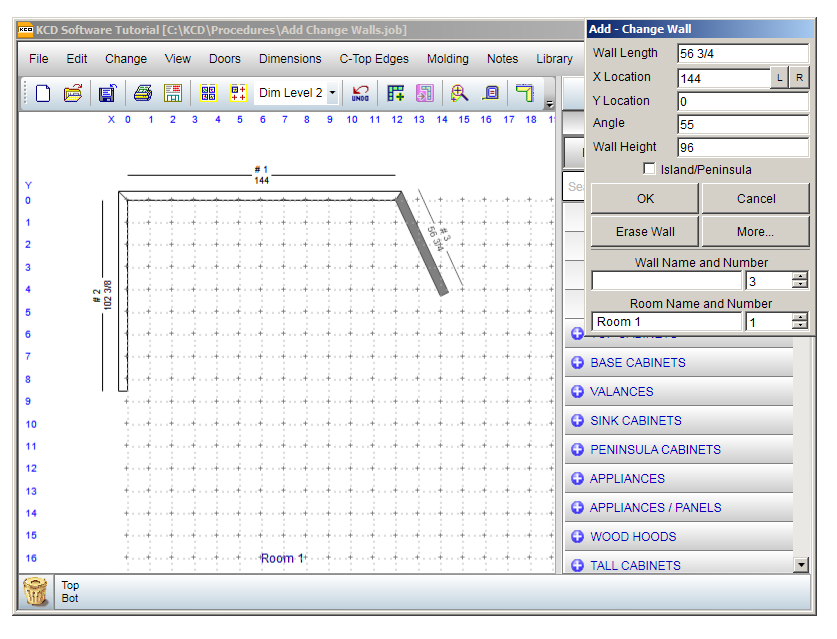
- Click on OK and the wall changes to a 55 degree angle.
Flip a Wall
If you move a wall from one side of the workspace to another, it may end up facing the wrong direction. Let’s say that your drawing looks like this:
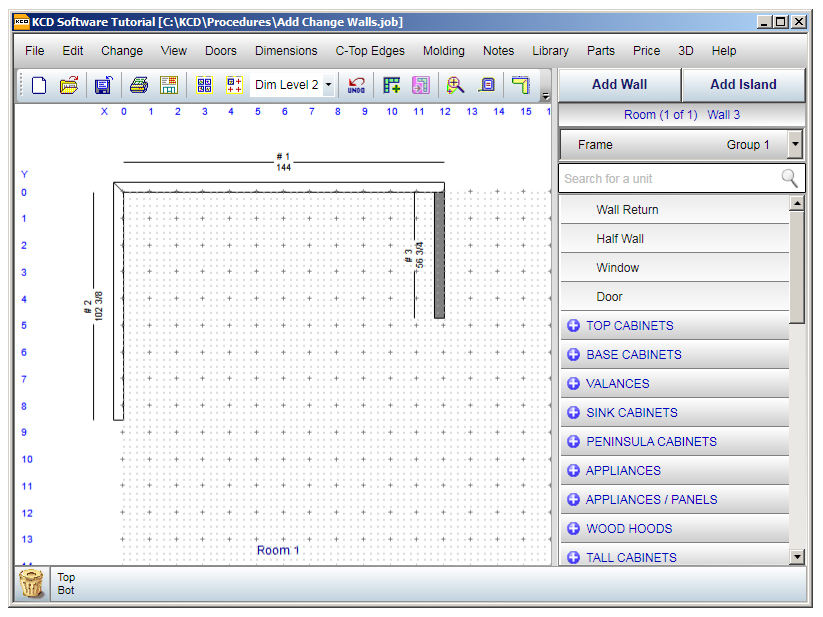
Note that on the right-hand wall (#3), the length (34) appears inside the room you’re designing. This means that the wall is turned around: any cabinets you hang on wall #3 will hang on the outside of the room. You need to flip the wall so that it is facing the other walls and clearly part of the room you are designing, not the room next door.
- Click on the middle of the wall #3 to access the Add – Change Wall
- Click on the MORE button to show the full Add-Change Wall
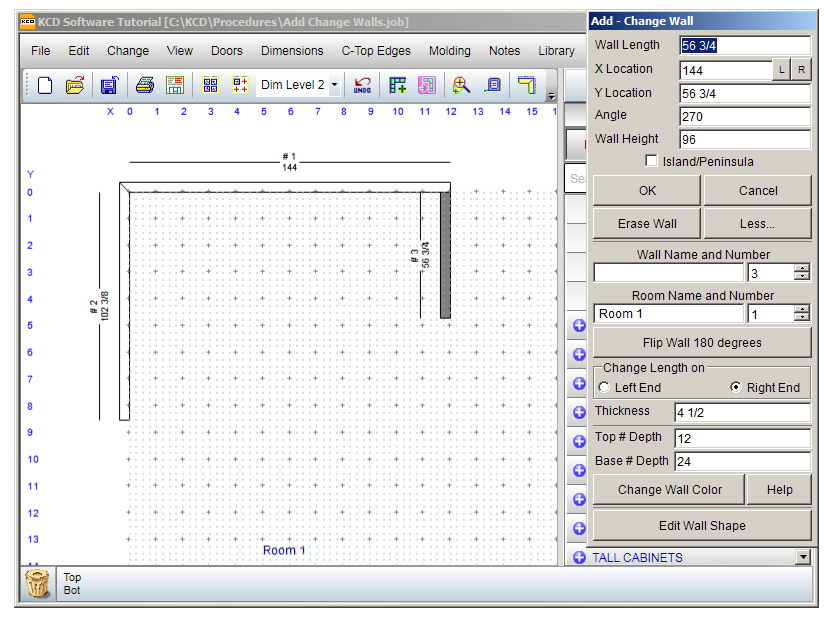
- Click on Flip Wall 180 degrees.
You might see a message: “You may also need to ‘Flip’ any adjoining walls.” Click on OK.
- The wall flips so that it is facing into the room.
Now any cabinets that you add will be part of the room you are designing, not part of the room next door.
Remove a Wall
The easiest way to remove a wall (or cabinet or anything else on your workspace) is to drag it to the trash bin in the lower left corner of the screen. You can retrieve an item from the trash bin within the same session by pressing Ctrl Z on your keyboard.
We hope this how-to has been helpful. At KCD Software, we always welcome comments and suggestions for making our Cabinet Suite, Closet Suite, and Doors Plus better—and easier to use.