How to Set & Change Shop Standards
KCD Software comes with several libraries, including frame and frameless cabinets and closets. Each library is pre-set with standards. For example, for the Frame library, the default standards include measurements for height and depth of cabinets, distance from the floor to the top of the top cabinets, and kick space. You will have your own preferences for these measurements matching your own design style.
NOTE: Any changes made to standards in your current project will not affect pre-existing projects.
Resetting the KCD Standards for Every Project
KCD Software comes to you with a default standard of 36-inches for the height of every cabinet. In this example, we’re going to assume that you like shorter cabinets, 34 inches. Therefore, you need to change the KCD default standard from 36 to 34.
- Click on Change in the top menu bar.
- Click on Set Shop Standards.
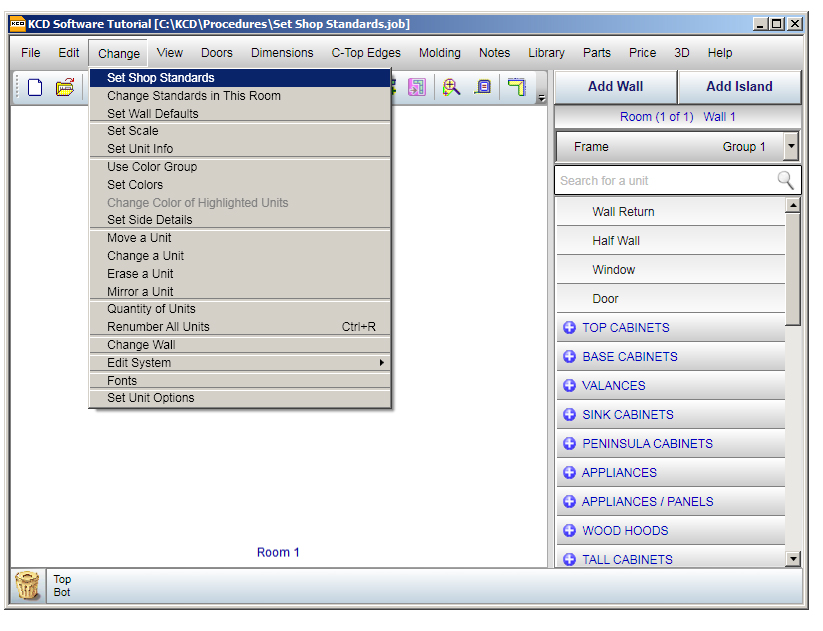
- A menu appears with the current default standards. In the example below, the Height of Top Cabinets is 36 inches.
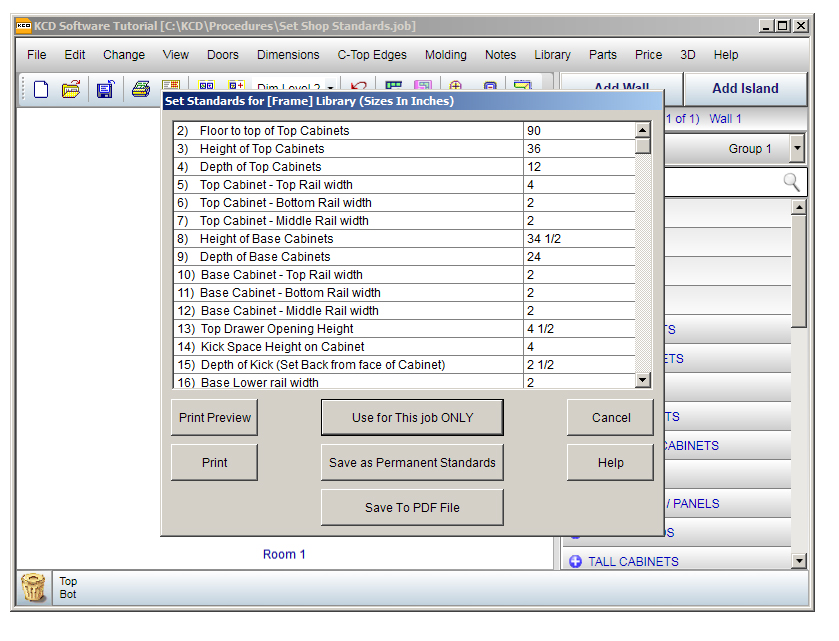
- Change the Height of Top Cabinets to 34 inches.
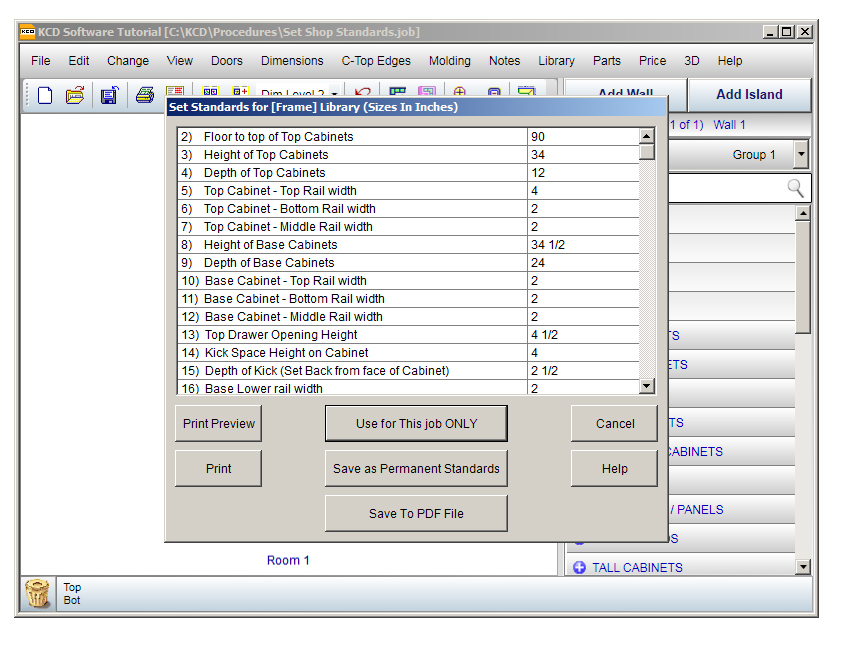
- Click Save as Permanent Standards. Now every project design will be based on cabinets with the height of 34 inches. The new number is your default starting point for every project.
- Click YES
Resetting the Standards for One Job
You’ve changed the default standard for cabinets to a height of 34 inches. However, a new client wants taller cabinets, 38 inches. You need to reset your standards for that client’s project only.
- Click on Change in the top menu bar.
- Click on Set Shop Standards.

- A menu appears with the current default standards. In the example below, default Height of Top Cabinets for all projects has been set to 34 inches.
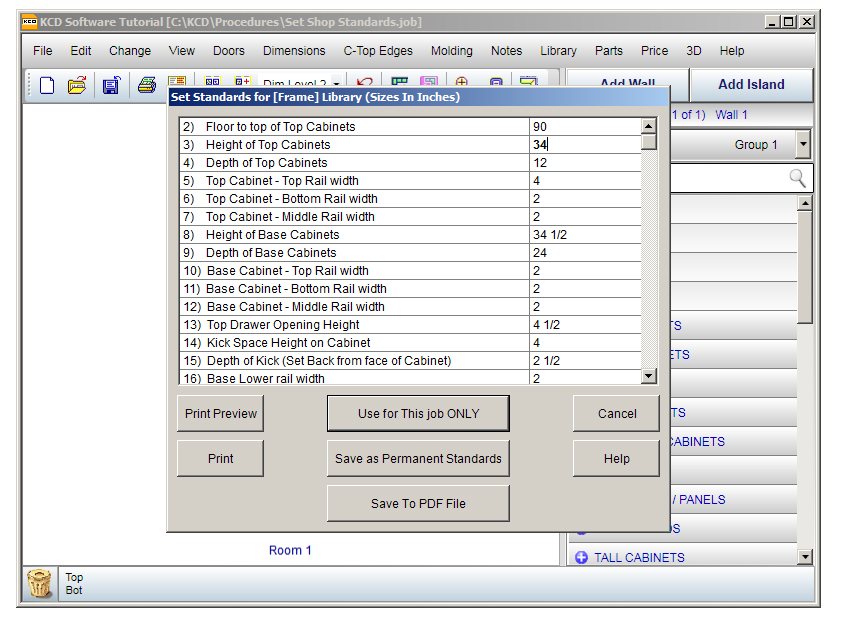
- Change the Height of Top Cabinets to 38 inches.
- Click on Use for This job ONLY. Now, in this project only, all cabinets will start with a default 38-inch height. Every other project will still start with a default of 34 inches.
Changing the Standards for a Single Cabinet
Your clients are very happy with the 38-inch high cabinets. But you need to make room for a refrigerator under one cabinet. That cabinet has to be shorter, only 24 inches. We’ll begin by setting up the wall and adding cabinets.
- Click Add Wall on the tool bar.
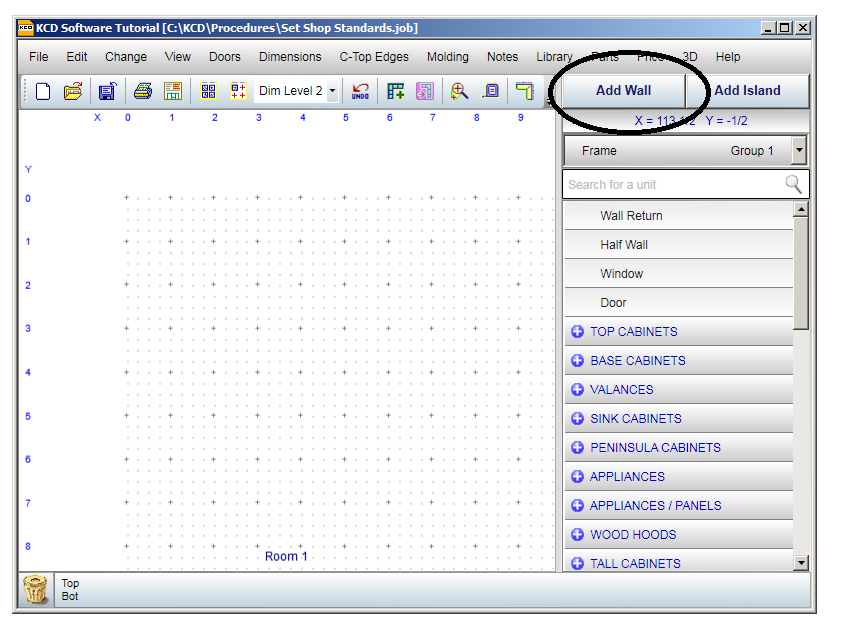
- Hold down your cursor and drag to the length of the wall.
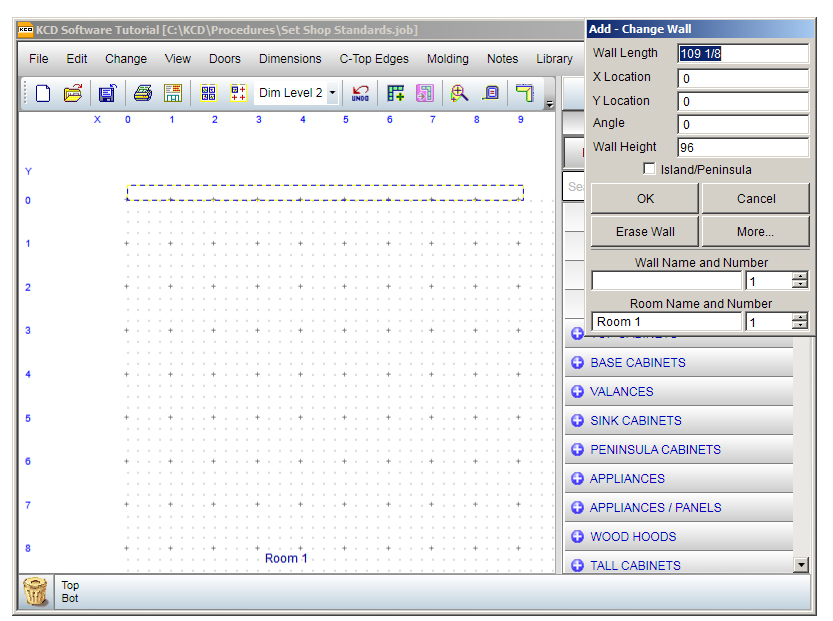
- On the popup menu, make sure the length, height, angle and other dimensions of the wall are correct.
- Click OK. You are now in the floor plan view.
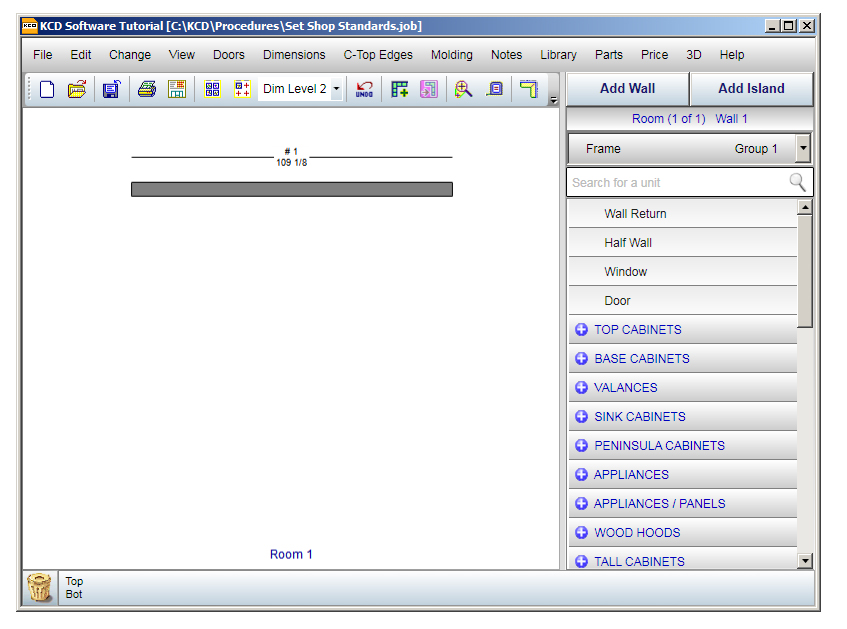
- Double click on any empty spot on the screen to see the wall face on (elevation view).
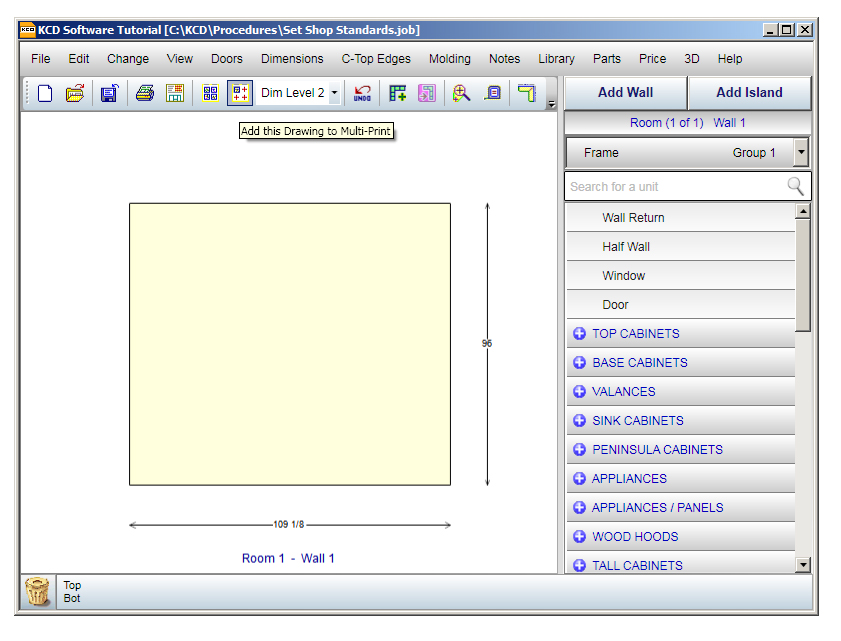
At this point, you may want to turn on the grid. If so, click on View, then click on Show Grid. All the steps following show the grid
- Click on Top Cabinet on the units menu.
- Click on Top Cabinet on the dropdown menu.
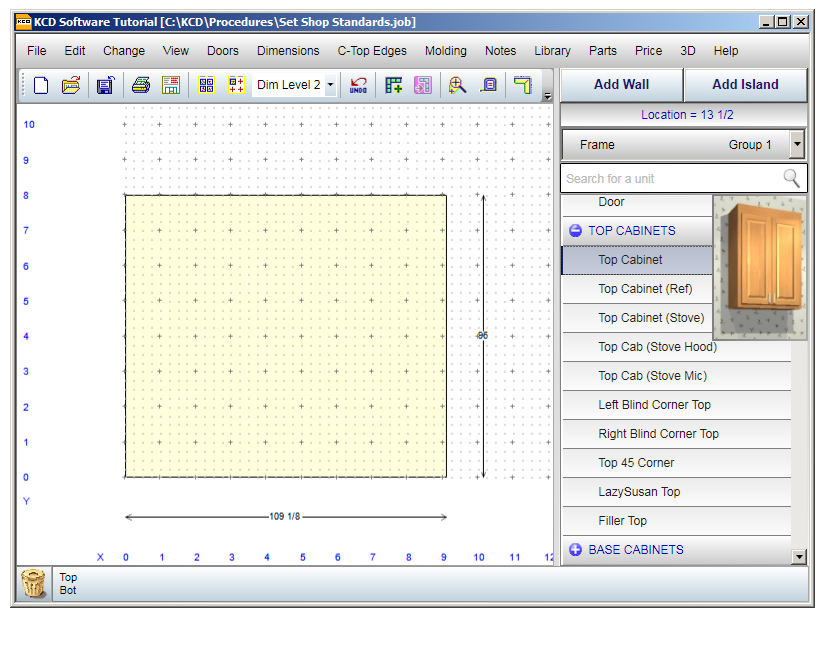
- When a picture of a cabinet appears, hold down your cursor on the wall and drag to create the outline of your first cabinet.
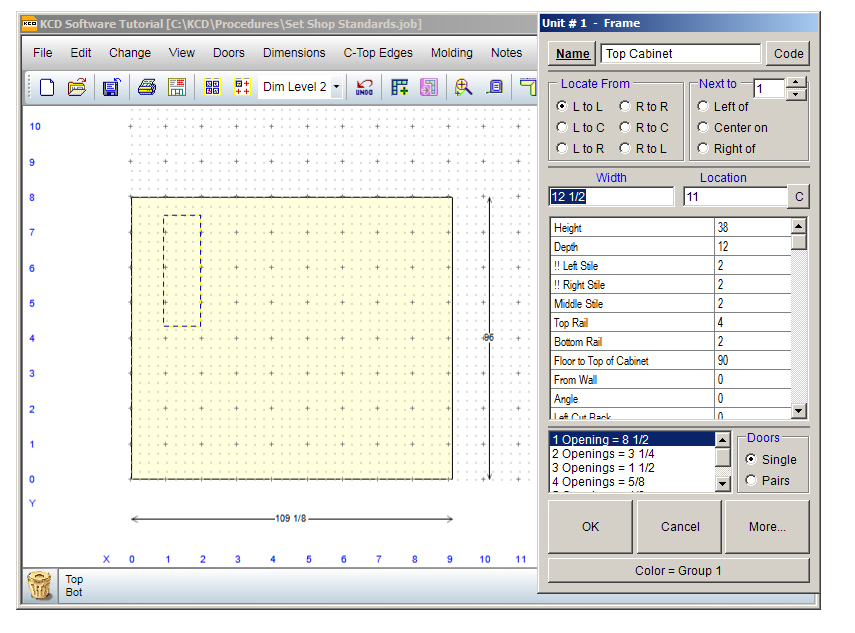
- A popup menu appears showing all the default sizes for your cabinet. Let’s assume this first cabinet matches the project defaults, including 38 inches in height and 1 opening (one door).
- Click on OK.
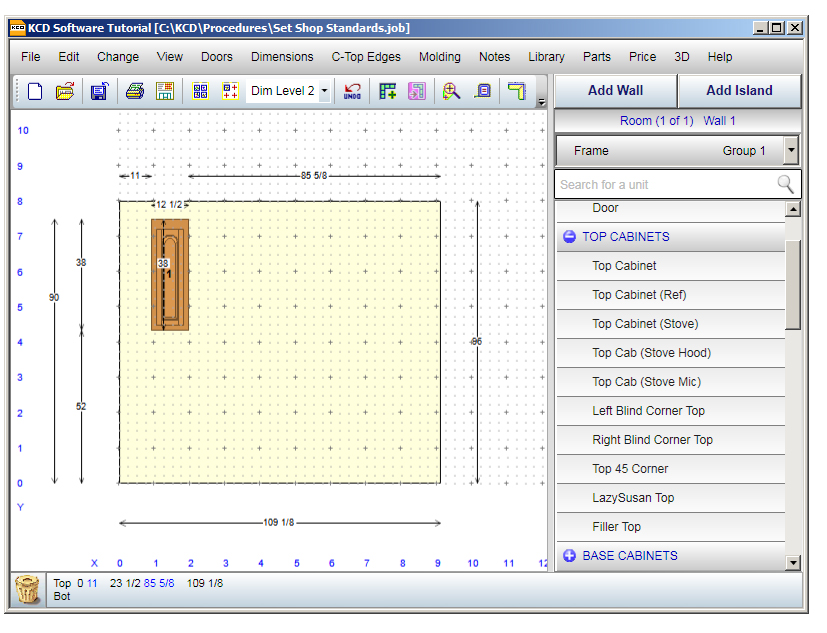
In this project, one of the cabinets has to be 12 inches high to accommodate a refrigerator.
- First, click on Top Cabinet and make the outline of the cabinet on the wall.
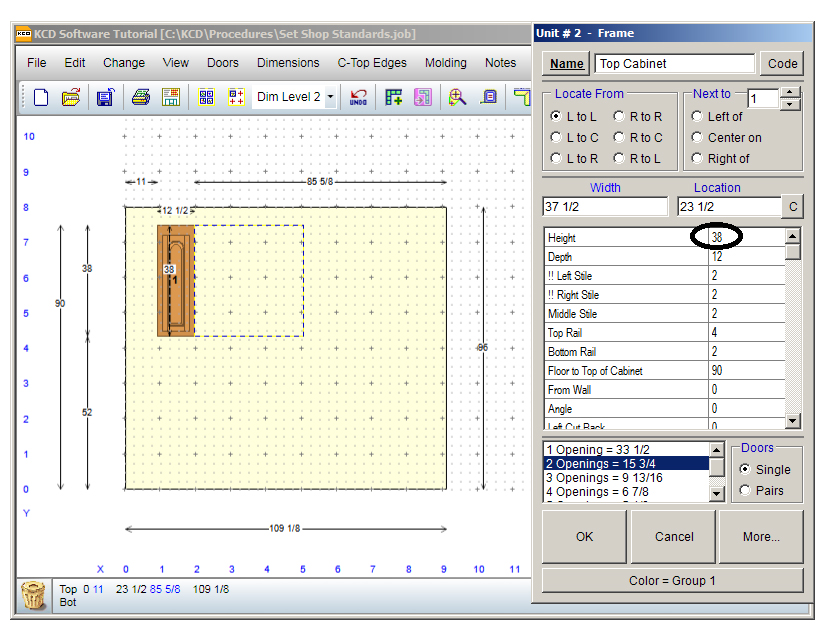
- When the popup menu appears, change the height to 12 inches.
- If you don’t have any other changes, click on OK.
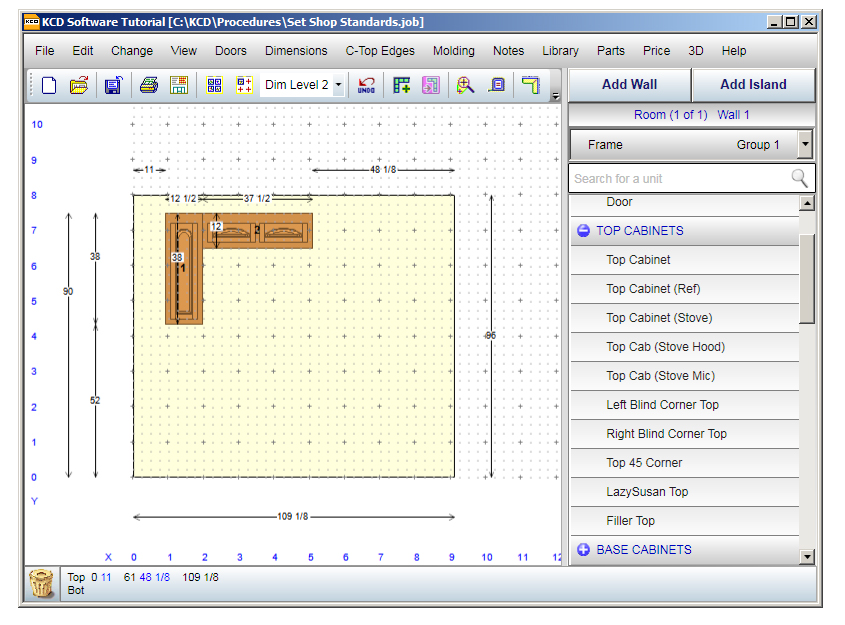
- The height of the new cabinet automatically changes to 12 inches.
If you find yourself changing more than three or four measurements on every single cabinet, go back to the Change menu and click on Set Shop Standards to set the correct defaults for all your projects or for this particular project.
We hope this how-to has been helpful. At KCD Software, we always welcome comments and suggestions for making our Cabinet Suite, Closet Suite, and Doors Plus better—and easier—than ever.